
3dfier is a command-line utility that does not have a graphical user interface (GUI). This means you need to run it from Command Prompt.
Verify installation
First thing to do is to test if the Installation was successful. You can do this by opening the Command Prompt (press windows button+R, type cmd and press enter) and dragging the 3dfier program into the Command Prompt window. If you now press enter the 3dfier program should output:
3dfier Copyright (C) 2015-2019  3D geoinformation research group, TU Delft
This program comes with ABSOLUTELY NO WARRANTY.
This is free software, and you are welcome to redistribute it
under certain conditions; for details run 3dfier with the '--license' option.

ERROR: one YAML config file must be specified.

Allowed options:
  --help                        View all options
  --version                     View version
  --license                     View license
  --OBJ arg                     Output
  --OBJ-NoID arg                Output
  --CityGML arg                 Output
  --CityGML-Multifile arg       Output
  --CityGML-IMGeo arg           Output
  --CityGML-IMGeo-Multifile arg Output
  --CityJSON arg                Output
  --CSV-BUILDINGS arg           Output
  --CSV-BUILDINGS-MULTIPLE arg  Output
  --CSV-BUILDINGS-ALL-Z arg     Output
  --Shapefile arg               Output
  --Shapefile-Multifile arg     Output
  --PostGIS arg                 Output
  --PostGIS-PDOK arg            Output
  --PostGIS-PDOK-CityGML arg    Output
  --GDAL arg                    Output
Minimum system requirements
The software is built with the idea to make creating 3D models as easy as possible. Therefore the software doesn’t need supercomputers or special hardware. As long as you are not reconstructing extremely large areas the software allows to use any normal hardware. Most of the developments and testing have been done using a laptop with an Intel Core i7-6560U CPU, 16Gb RAM and SSD for data storage. A simple model can be created even using a laptop with less RAM and slower CPU.
Command line options
When executing 3dfier without any command line options the text output prints all possible options as shown in Verify installation. The --help option prints the same text output as when executed without any options. Using --version one can see the version of 3dfier and that of some of the libraries used. The --license option shows the license message of 3dfier and list the licenses of libraries used.
All other options (marked with Output) are model output formats that can be used to write the output. The option is the file format name followed by the arguments needed for the format.
In case of OBJ, OBJ-NoID, CityGML, CityGML-IMGeo, CityJSON, CSV-BUILDINGS, CSV-BUILDINGS-MULTIPLE, CSV-BUILDINGS-ALL-Z and Shapefile the argument is the file name of the output.
In case of CityGML-Multifile, CityGML-IMGeo-Multifile andShapefile-Multifile the argument is the first part of the file name that will be followed by the input layer name and the file extension. If arg is filename_ the resulting format is filename_layername.ext.
In case of PostGIS, PostGIS-PDOK and PostGIS-PDOK-CityGML the argument is a PostGIS connection string in the format used by GDAL. The string must be surrounded by single quotes so 3dfier understands it as a single option. Example: 'PG:"dbname='databasename' host='addr' port='5432' user='x' password='y'"'.
Prepare example data
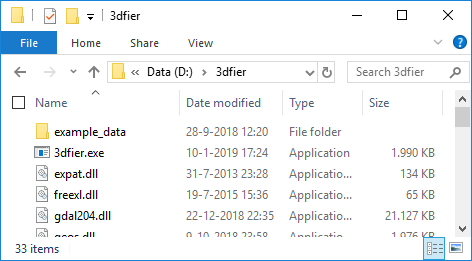
For this example we use BGT_Delft_Example.zip from the GitHub repository located in 3dfier/resources/Example_data/. Create a folder with 3dfier and the depencency dll’s by following the Installation instructions and add the example_data folder.
Running with example data
Opening the Command Prompt (press windows button+R, type cmd and press enter) and navigate to the folder where 3dfier is located.
Now go into the example data folder using cd example_data and run ..\3dfier.exe testarea_config.yml --OBJ output\myfirstmodel.obj. Now 3dfier will start processing and when finished it produced your first 3D model!
The output file is written to example_data\output\myfirstmodel.obj and console output should be as follows.
3dfier Copyright (C) 2015-2019  3D geoinformation research group, TU Delft
This program comes with ABSOLUTELY NO WARRANTY.
This is free software, and you are welcome to redistribute it
under certain conditions; for details run 3dfier with the '--license' option.

Config file is valid.
Reading input dataset: bgt\bgt_waterdeel.sqlite
        Layer: waterdeel
        (3 features --> Water)
Reading input dataset: bgt\bgt_ondersteunendwaterdeel.sqlite
        Layer: ondersteunendwaterdeel
        (0 features --> Water)
Reading input dataset: bgt\bgt_onbegroeidterreindeel.sqlite
        Layer: onbegroeidterreindeel
        (81 features --> Terrain)
Reading input dataset: bgt\bgt_wegdeel.sqlite
        Layer: trafficarea
        (151 features --> Road)
Reading input dataset: bgt\bgt_ondersteunendwegdeel.sqlite
        Layer: auxiliarytrafficarea
        (0 features --> Road)
Reading input dataset: bgt\bgt_pand.sqlite
        Layer: buildingpart
        (160 features --> Building)
Reading input dataset: bgt\bgt_begroeidterreindeel.sqlite
        Layer: plantcover
        (126 features --> Forest)
Reading input dataset: bgt\bgt_scheiding.sqlite
        Layer: scheiding
        (57 features --> Separation)
Reading input dataset: bgt\bgt_kunstwerkdeel.sqlite
        Layer: kunstwerkdeel
        (1 features --> Separation)
Reading input dataset: bgt\bgt_overigbouwwerk.sqlite
        Layer: overigbouwwerk
        (0 features --> Separation)
Reading input dataset: bgt\bgt_overbruggingsdeel.sqlite
        Layer: bridgeconstructionelement
        (3 features --> Bridge/Overpass)

Total # of polygons: 570
Constructing the R-tree... done.
Spatial extent: (84,616.468, 447,422.999) (85,140.839, 447,750.636)
Reading LAS/LAZ file: ahn3\ahn3_cropped_1.laz
        (640,510 points in the file)
        (all points used, no skipping)
        (omitting LAS classes: 0 1 )
[==================================================] 100%
Reading LAS/LAZ file: ahn3\ahn3_cropped_2.laz
        (208,432 points in the file)
        (all points used, no skipping)
        (omitting LAS classes: 0 1 )
[==================================================] 100%
All points read in 1 seconds || 00:00:01
3dfying all input polygons...
===== /LIFTING =====
===== LIFTING/ =====
=====  /ADJACENT FEATURES =====
=====  ADJACENT FEATURES/ =====
=====  /STITCHING =====
=====  STITCHING/ =====
=====  /BOWTIES =====
=====  BOWTIES/ =====
=====  /VERTICAL WALLS =====
=====  VERTICAL WALLS/ =====
Lifting, stitching and vertical walls done in 0 seconds || 00:00:00
=====  /CDT =====
=====  CDT/ =====
CDT created in 0 seconds || 00:00:00
...3dfying done.
OBJ output: output\myfirstmodel.obj
Features written in 0 seconds || 00:00:00
Successfully terminated in 2 seconds || 00:00:02
Data that is generated
Only 3D data is generated for 2D polygons supplied in the input. If no polygon is input for terrain it is not automagically generated. There is no option (yet) for the creation of terrain within the polygons extent or point file extent. A Generate terrain polygon tutorial is written to create a topologically terrain polygon with building footprints cut out.
Known issues
Missing DLL’s
If you see an error message about missing MSCVRxxx.dll instead of this text you may need to do one of the following:
- MSCVR100.dll is missing: Install the Microsoft Visual C++ 2010 Redistributable
- MSCVR120.dll is missing: Install the Microsoft Visual C++ 2013 Redistributable
- MSCVR140.dll is missing: Install the Microsoft Visual C++ 2015 Redistributable