Virtual environments (venv)
What is a venv?
A Python virtual environment (venv) is "created on top of an existing Python installation [...] and may optionally be isolated from the packages in the base environment". Each venv will have its own set of Python packages, indepedent from the the main Python installation.
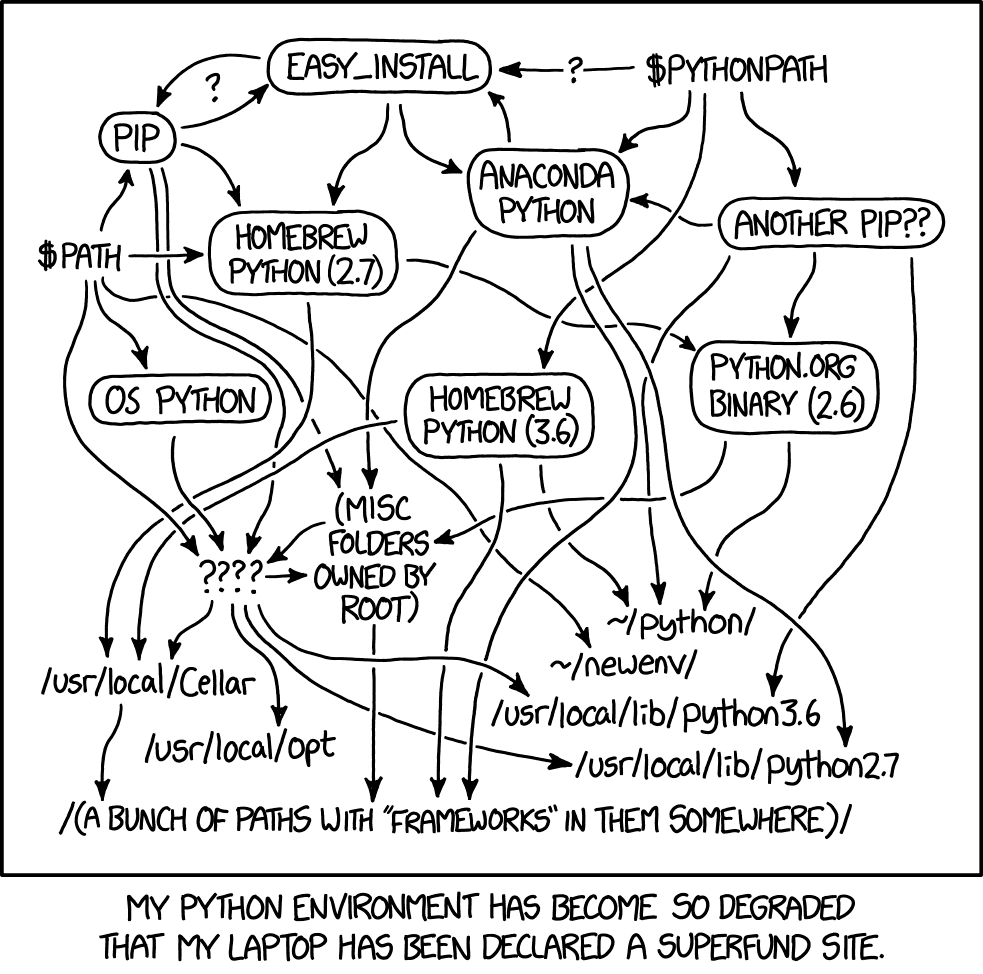
It allows us to avoid this mess (from xkcd-1987):
How to create and use a venv
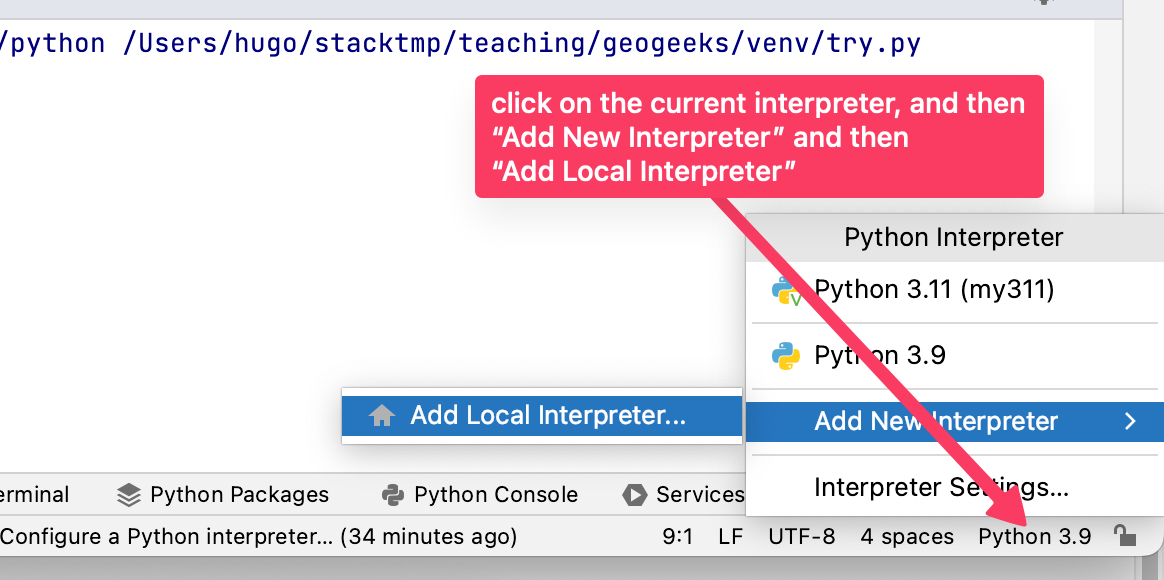
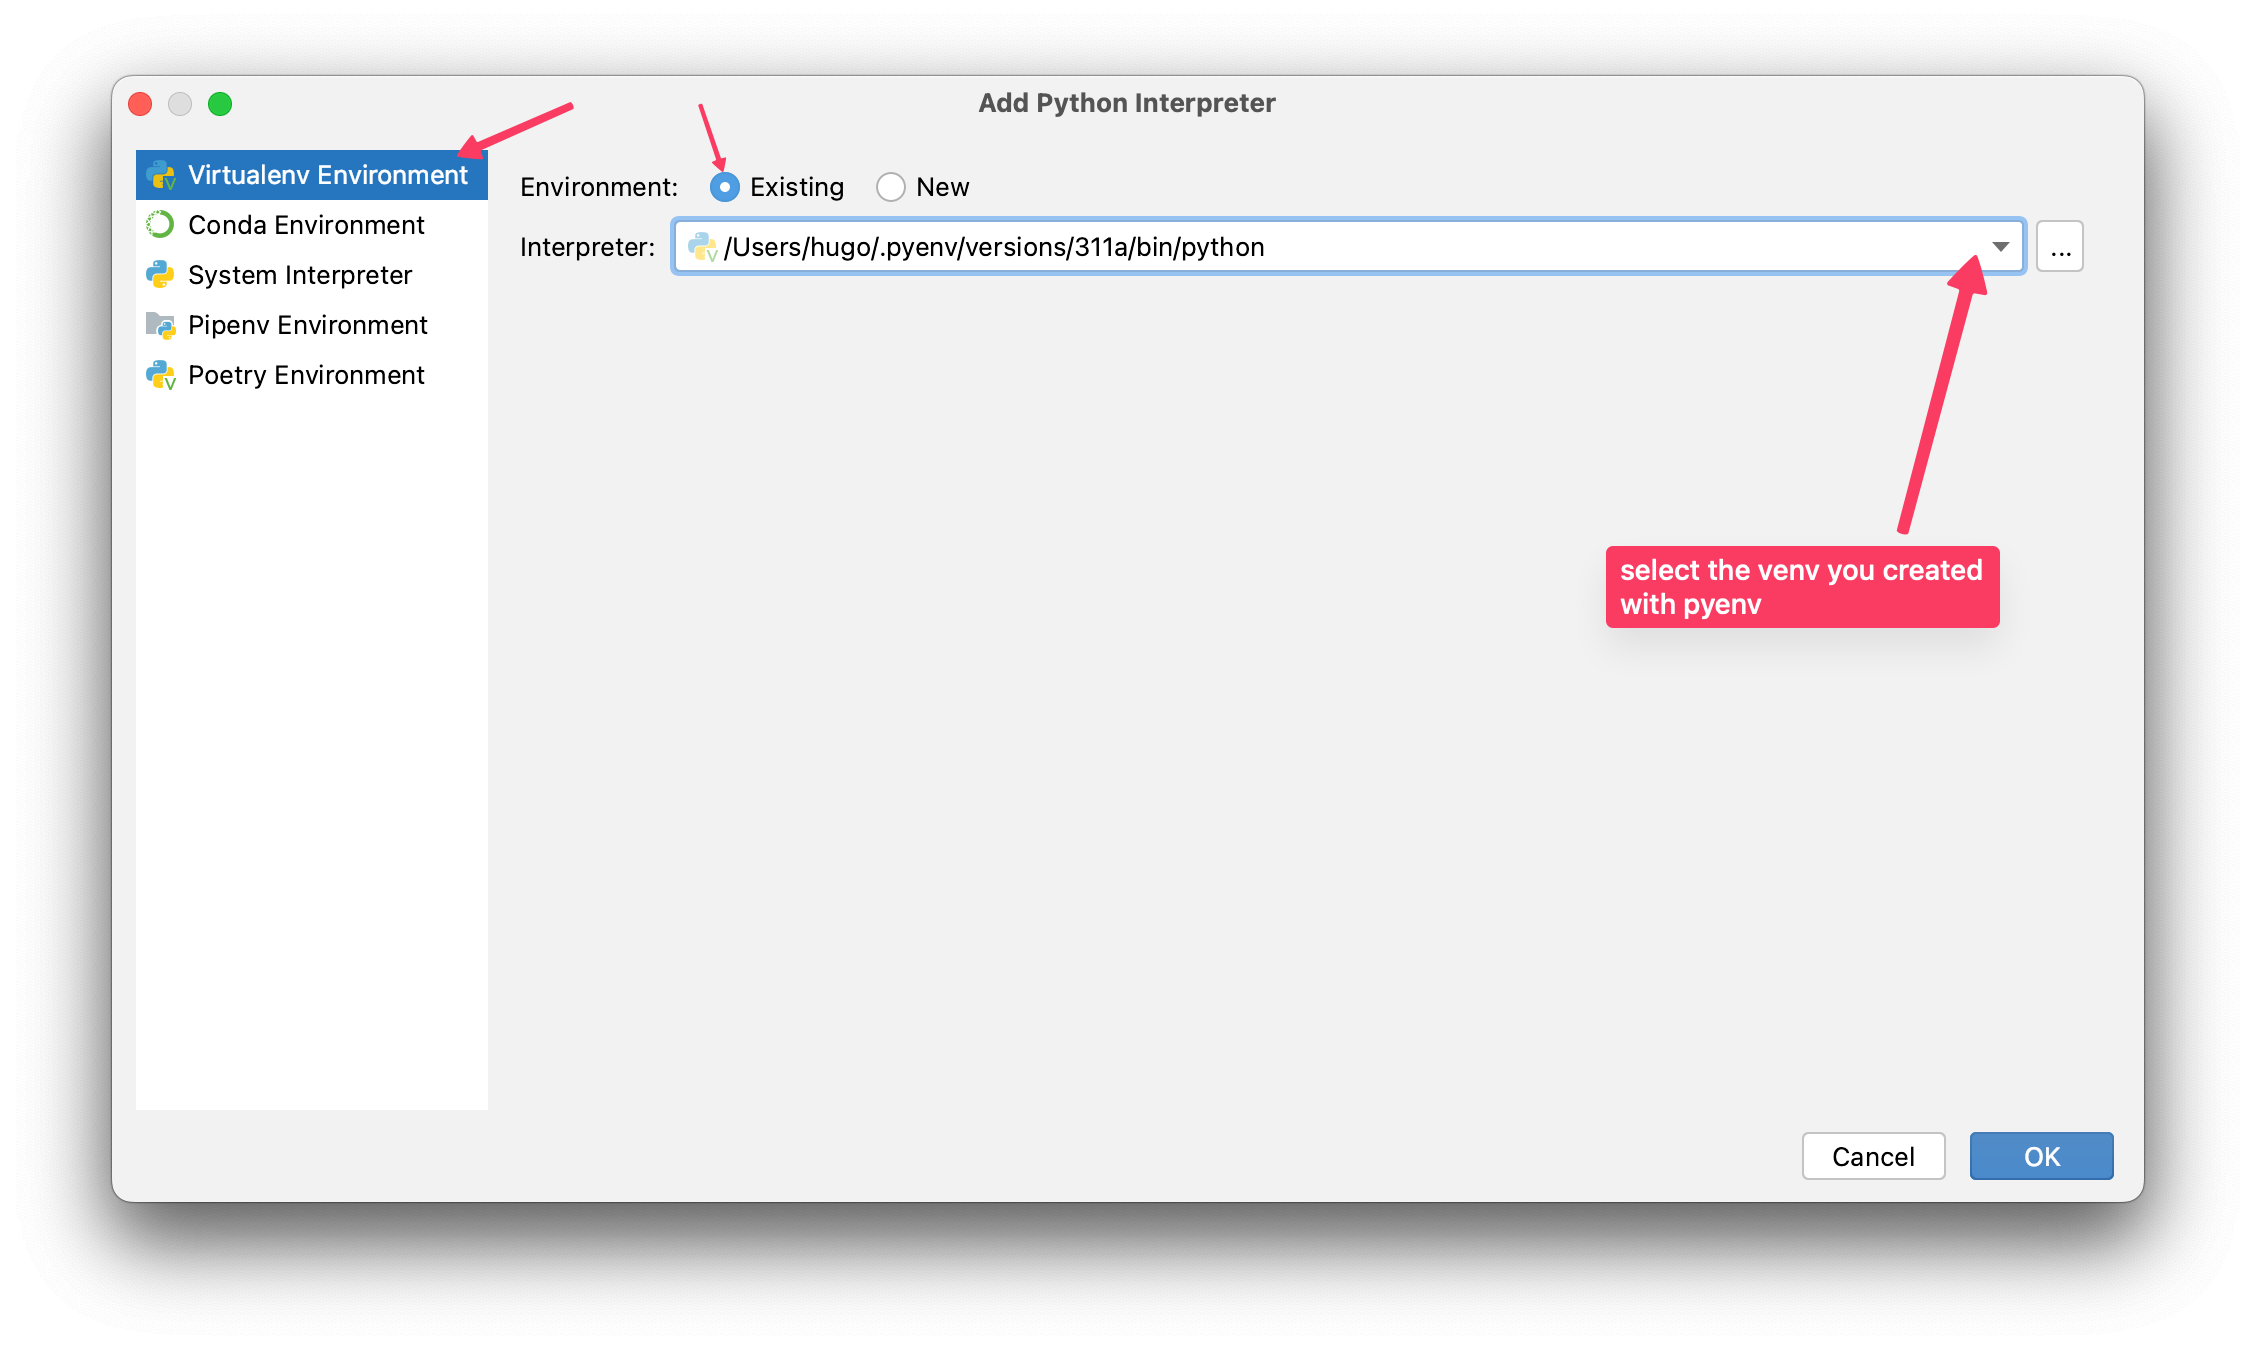
PyCharm allows you to create venv and activate them, follow those instructions:
If you used pyenv to install Python (this is what we recommend for macOS and Linux!), then you can also install the pyenv-virtualenv plugin to install and manage your virtual environments. It keeps a global list of which versions and venv you have installed, and allows you to easily switch between them.
To install:
- macOS:
brew install pyenv-virtualenv - Linux: see details
Some useful commands:
- create a new venv called "myenv1" (based on the current global version):
pyenv virtualenv myenv1 - activate it:
pyenv activate myenv1 - deactivate it:
pyenv deactivate
venv are builtin Python, and you can install a venv in a specific folder. In the folder where you have some code, you can create a new venv:
For Windows, replace ./myenv by the path where you want the venv.
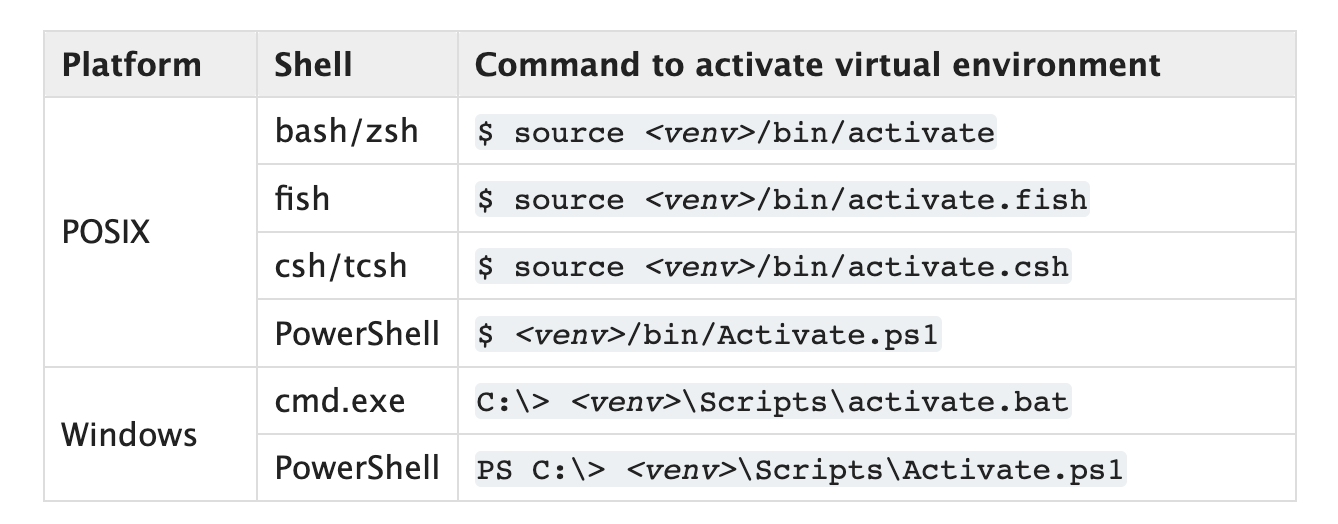
Then the venv needs to be activated, how to do this depends on your OS and used console:
If you're still in the folder above, with macOS I need to:
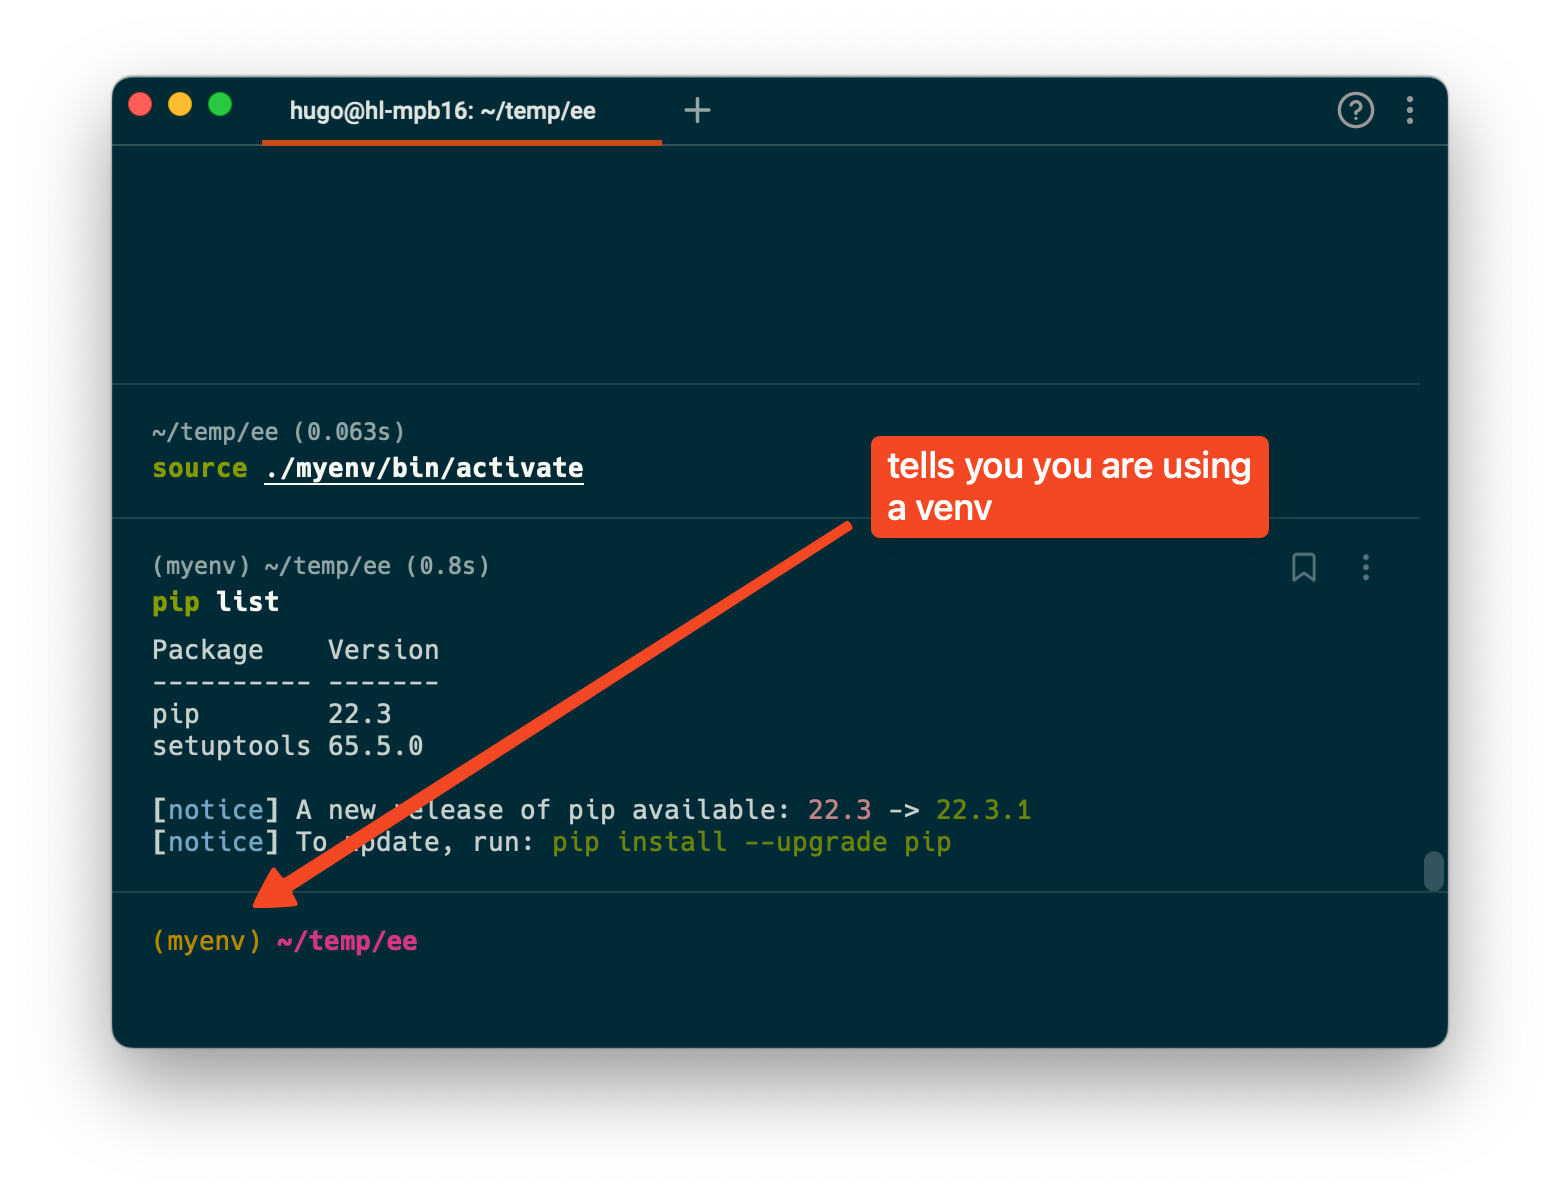
The new venv you created is empty, that is it should only have 2 packages as shown in the console above.
You can install new packages with pip install numpy and those will be added in the venv.
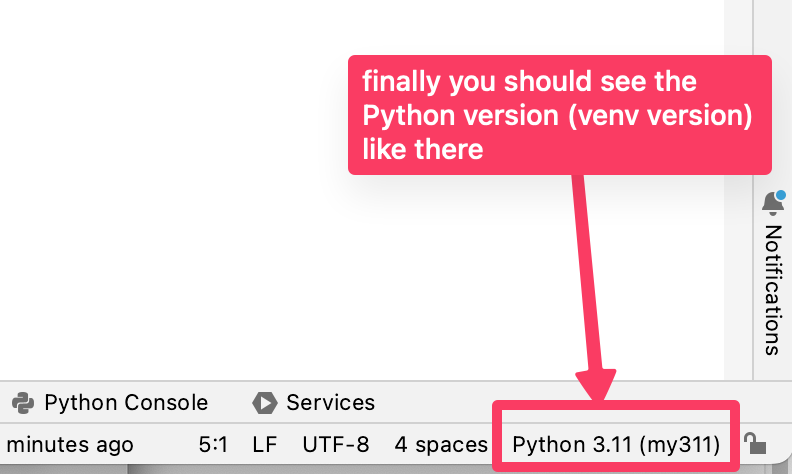
As long as you see the name of your venv between brackets ((myenv)) it means that you are using the venv.
To stop using this venv:
Just activate and select a new interpreter (which must be a venv, not a Python version!), following those steps: